Management and configuration instructions for the Airin Blog theme
Useful materials
These are not bugs, these are features
How to increase website loading speed with Airin Blog
Airin Blog theme official presentation page
Content:
Installing and activating the theme
Installing and activating the necessary plugins
Separate sidebar orientation for posts and pages
Additional settings and features
Installing and activating the theme
- In the WordPress control panel, go to the “Appearance” section, then to the “Themes” section
- At the top, click on the “Add New Theme” button, then “Upload Theme”
- Select the “.zip” file containing the theme and click “Install Now”
- Click “Activate Theme”
License key activation (only for premium)
After purchasing the premium version of the theme, you will receive an email with a link to download “Airin Blog Premium”. Install and activate it according to the instructions above.
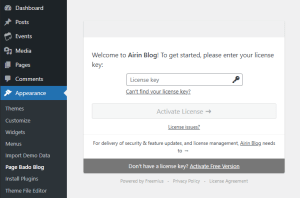
After activation, the theme (Airin Blog Premium), will open a window for entering the activation key. But if this does not happen, use these instructions.
- In the WordPress control panel, go to the “Appearance” section, then to the “Page Airin Blog ” and “Account” section
- On the page that opens, enter the personal key you received in the “License Key” field
If the section does not open, you may have used the “Activate Free Version” setting while you were in the premium version of the theme.
To return the theme state to the premium version:
- Go to the “Appearance” section, then to the “Themes” and select a theme by clicking “Theme Information”
- In the lower right corner, click the “Opt-in” button
- You will then be redirected to enter your license key
Installing and activating the necessary plugins
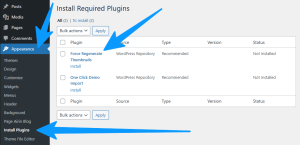
- In the WordPress control panel, go to the “Appearance” section, then to the “Install Plugins” section
- Install and activate the necessary plugins using the “Install” and “Activate” buttons
List and description of plugins:
- DMC Apps Functions – Adds additional functionality – More details
- DMC Social Links Pack for Airin – Enhances social links – More details
- One Click Demo Import – Allows you to import demo data – More details
- Force Regenerate Thumbnails – Recreates your old images to fit the parameters of the new theme – Plugin page
Importing demo data (only for premium)
- To import demo data, install and activate the plugin “One Click Demo Import” using the instructions written above
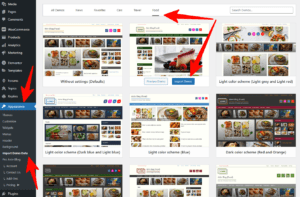
- In the WordPress control panel, go to the “Appearance” section, then to the “Import Demo Data” section
- Select your preferred theme and design version
Any difficulties? Read more – Import in one click full demo versions of sites
Theme Settings
Most of the theme settings are located in the WordPress visual editor
- In the WordPress control panel, go to the “Appearance” section, then to the “Customize” section
- Select the required section to customize the appearance of your site
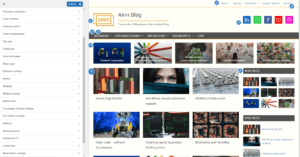
Sections and settings are well structured. You can easily navigate the location of the necessary functionality. We also added additional markers to the visual editor to quickly navigate to the required settings section.
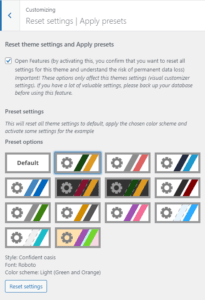
Reset theme settings and apply presets
If you have a premium version:
- In the WordPress control panel, go to the “Appearance” section, then to the “Customize” section
- Select the “Presets | Reset settings | Import” section
- Activate the warning checkbox
- Select a reset option (without settings or with settings) and click “Apply”
Here you can experiment. Select the necessary presets to familiarize yourself with the possibilities, or reduce the time it takes to customize the theme. Resetting theme settings takes about 5 seconds.
More information – How to reset theme settings (WordPress)
If you have a free version – Read: How to reset settings in a free theme
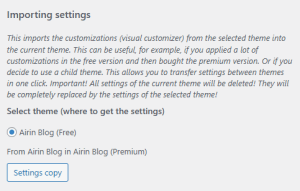
Import theme settings
If you have the premium version:
In the visual customizer in section “Presets | Reset settings | Import”, you will find the import function. It imports customizations (visual customizer) from the selected theme into the current theme.
This can be useful, for example, if you applied a lot of customizations in the free version and then bought the premium version. Or if you decide to use a child theme on top of a premium theme.
This will allow you to transfer customizations between themes in one click.
For the function to work, you need to have at least two suitable themes already installed:
- From which you want to import settings (Airin Blog, Airin Blog Premium, Airin Blog Premium Child)
- Current active theme (Airin Blog Premium, Airin Blog Premium Child)
Important! If you have already uninstalled the theme you need. Just install it again. The theme settings are saved in the database, and after reinstallation, the theme will return its settings.
If you have the free version:
Section “Presets | Reset settings | Import” is not available in the free version.
To import settings in the free version, use plugin Child Theme Copy Settings
- Install and activate plugin
- In the WordPress control panel, go to the “Appearance” section, then to the “Child Theme Copy Settings” section
- Select the theme from where to take the settings and click “Copy settings” button
It will allow you to import your customizations from Airin Blog into Airin Blog Child
Separate sidebar orientation for posts and pages
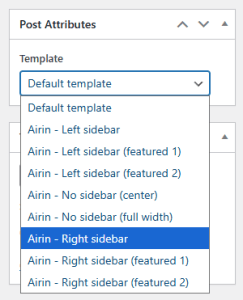
We have made separate templates for the pages and posts, with their own sidebar orientation.
To use this:
- Open or create a new page (or post).
- On the right side of the screen, in the “Template” section, select the required template.
- After saving, the page will have the appropriate sidebar orientation.
Additional settings and features
We have added some technical settings on a separate page
- In the WordPress control panel, go to the “Appearance” section, then to the “Page Airin Blog” section
- Select the required tab to display the settings
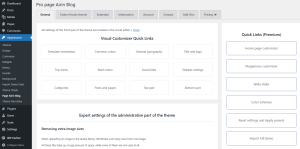
General tab
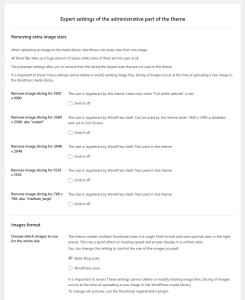
In addition to quick links, the tab contains a section “Expert settings of the administrative part of the theme”.
Important! These settings globally affect the entire site and require advanced user qualification.
The section contains:
- Remove unnecessary (large) image sizes
- Define the format of theme images
- Customize post main image size
- Default avatar for users
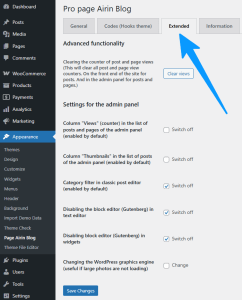
Extended tab
This tab appears after installing the DMC Apps Functions
The tab contains:
- Function (button) for clearing the counter of post and page views
- (On/Off) Column “Views” (counter) in the list of posts and pages of the admin panel
- (On/Off) Column “Thumbnails” in the list of posts of the admin panel
- (On/Off) Category filter in classic post editor
- Option to disable block editor (Gutenberg) in text editor
- Option to disable block editor (Gutenberg) in widgets
- Ability to change WordPress graphics engine (useful if large photos are not loading)
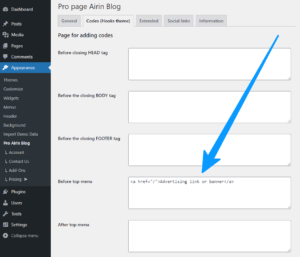
Hooks
Our templates have lots of hooks implemented. With these hooks, you can add your content (advertising banners, announcements, text, design elements) to predefined places.
If you have a premium version, just use the prepared windows to insert your content
- Go to the Appearance section, then Page (theme section), and open the Codes (Hooks theme) tab
- Paste your content into the desired window and click “save”
If you the free version or want to use hooks directly, use – List of hooks for the Airin Blog theme
Child theme
We have prepared for you – Child Airin Blog theme
To properly modify the code in Airin Blog theme files, it is correct to use a child theme.
If you make changes to the main theme files, all your changes will be overwritten after the update. To avoid losing edits, you should make changes to the child theme files.
When do I need to use a child theme?
- I only want to change the styles – Use: WordPress control panel – Appearance – Customize – Additional CSS
- I just want to add my own features or filters – Use the plugin: DMCWZ-Free-Functions
- I want to change the theme files – Use the child theme
- I want to make multiple changes to the theme’s styling, files and features – Use the child theme
How to enable a child theme:
- Download the child theme – (for free DOWNLOAD), (for premium DOWNLOAD)
- Install a theme – Don’t know how? Read – How to install a WordPress theme
- Activate the theme
All functionality and settings of the mother theme will continue to work, and all your changes made to the code of the child theme will not be overwritten after updates.
Support
If you find errors:
- Technical issues
- Errors in translation
- Logical description errors
Let us know!
- Go to page – Support
- Click “Open Ticket”
- Register if necessary
- Open a ticket and fill out the required fields
- If necessary, provide your URL address and upload a screenshot
- Click the “Create Ticket” button and your ticket will be created
If, when registering or filling out a ticket, you indicate your email address to which you placed the order. Your question will be considered as a priority.




Leave a Reply
You must be logged in to post a comment.