Management and configuration instructions for the DMC Promo Banner plugin
Useful materials
DMC Promo Banner plugin official presentation page
DMC Promo Banner Plugin Update List
Content:
Installing and activating the plugin
Installing and activating the plugin
- In the WordPress control panel, go to the “Plugins” section
- At the top, click on the “Add Plugin” button, then “Upload Plugin”
- Select the “.zip” file containing the plugin and click “Install Now”
- Click “Activate Plugin”
License key activation (only for premium)
After purchasing the premium version of the plugin, you will receive an email with a link to download “Sale Banner Premium”. Install and activate it according to the instructions above.
After activation, the plugin (Sale Banner Premium), will open a window for entering the activation key.
But if this does not happen, use these instructions:
- In the WordPress control panel, go to the “Appearance” section, then to the “DMC Sale Banner ” and “Account” section (or tab)
- On the page that opens, enter the personal key you received in the “License Key” field
If the section does not open (or he is invisible), you may have used the “Activate Free Version” setting while you were in the premium version of the plugin.
In such a case:
- Go to the “Plugins” section
- In the list of plugins, find the plugin “DMC Promo Banner Premium”
- Under the plugin name, click on the link “Activate License”
- You will then be redirected to enter your license key
Plugin Settings
To start configuring the plugin:
- In the WordPress control panel, go to the “DMC Banner” section
- At the top, select (tab) the module you need to configure
You can customize 5 separate banners on 5 separate tabs:
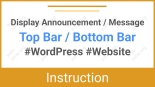
- Top sticky banner (Top Bar) – is displayed on all pages of the site and can be set as sticky when scrolling.
- Bottom sticky banner (Bottom Bar) – is also displayed on all pages. It is always sticky and its position can be customized (left, right, center, or full width).
- Banner via widget – allows you to display a sales or notification banner in your sidebars.
- Banner via shortcode – lets you insert a sale banner into any text editor — for example, in posts, pages, category descriptions, products, and more.
- Banner for WooCommerce – allows you to choose the placement of the advertising banner on the product page. You can also set its placement on the product list page, cart page, order page, and user account page.
Each module has similar settings. For example, you can add banner text, add a button, choose a design, and adjust the margins.
But some modules also have individual settings. For example, the top banner has a setting to make it sticky. And the WooCommerce module allows you to choose the position of the banner on the product page.
Sections and settings are well structured. You can easily navigate the location of the necessary functionality.
Support
If you find errors:
- Technical issues
- Errors in translation
- Logical description errors
Let us know!
- Go to page – Support
- Click “Open Ticket”
- Register if necessary
- Open a ticket and fill out the required fields
- If necessary, provide your URL address and upload a screenshot
- Click the “Create Ticket” button and your ticket will be created
If, when registering or filling out a ticket, you indicate your email address to which you placed the order. Your question will be considered as a priority.