How to Set Up WordPress Properly – Detailed Instructions
After installing WordPress, many users leave the default settings unchanged. However, this can lead to future problems with security, site speed, SEO, and overall usability. This guide walks you through the essential steps to properly configure your WordPress site right after installation and avoid common mistakes.
1. Basic WordPress Settings
1.1 General Settings
Dashboard – Settings – General

- Site Title
- This is the primary name of your site. It appears in the browser title bar, tabs, and often in themes.
- Important for branding and can affect your SEO rankings.
- Examples: “Marketing Blog” or “Electronics Store”.
- Tagline
- A short description of what your site is about. Often displayed near the site title or in the footer.
- May be used in meta descriptions by search engines.
- Example: “Helpful tips on digital marketing”.
- WordPress Address (URL) & Site Address (URL)
- These define where your WordPress core files are located and how your site is accessed.
- If using an SSL certificate, make sure to use https://.
- They are typically the same if WordPress is installed in the domain root. If in a subfolder, they may differ.
- Administrator Email Address
- This is used for system notifications (updates, password recovery, plugin alerts, etc.).
- Make sure it’s active and accessible.
- Membership
- Enable “Anyone can register” only if user registration is required (e.g., for forums or communities).
- Be cautious: open registration requires anti-spam protection.
- New User Default Role
- Sets the role assigned to newly registered users.
- If unsure, choose “Subscriber.”
- Site Language
- Controls the language of the admin panel and affects theme/plugin localization.
- Also affects how dates, forms, and notifications are formatted.
- Timezone
- Set based on your location using city names or UTC offset.
- Affects publishing times, backups, and scheduled tasks.
- Date and Time Format
- Choose formats that suit your audience and preference.
- Used in posts, comments, and publishing schedules.
- Week Starts On
- Select which day your site’s calendar views start with. Monday is the default.
1.2 Reading Settings
Settings – Reading

- Your homepage displays
- Choose between a static homepage and your latest posts.
- Static Page: Best for business sites, landing pages, or portfolios.
- Latest Posts: Ideal for blogs and news sites.
- Posts page
- If using a static homepage, assign a separate page for your blog posts.
- Create a page called “Blog” and assign it here.
- Blog pages show at most
- Controls how many posts are shown per page on blog and archive pages.
- Recommended: 5–10 for faster loading and better UX.
- Syndication feeds show the most recent
- Sets the number of posts included in RSS feeds (usually 10).
- For each article in a feed, show
- Choose “Summary” to reduce server load and protect your content from being scraped.
- Search engine visibility
- Temporarily discourage indexing during development by checking this option.
- Important: Uncheck before launching the site, or it won’t appear in search engines.
1.3 Writing Settings
Settings – Writing

- Default Post Category
- Used when no category is manually selected for a post.
- Rename “Uncategorized” to something more relevant or create a new one.
- Default Post Format
- Relevant only for themes that support post formats (e.g., video, quote, image).
- Post via email (optional)
- Lets you publish posts by sending emails to a special address (requires POP3 configuration).
- Rarely used but may be helpful in specific scenarios.
1.4 Discussion Settings
Settings – Discussion

- Allow comments
- Enable or disable comments for new posts globally.
- If only used on blog posts, turn it on but configure moderation.
- Comment moderation
- Add filters based on keywords, link count, or email addresses.
- Suspicious comments will be held for manual approval.
- Comment blacklist
- Comments with certain words, IPs, or URLs are automatically trashed.
- Comment notifications
- Enable email alerts for new comments or moderation requests.
- Avatars
- Gravatars are enabled by default. You can customize or disable them entirely.
2. Permalinks (Pretty URLs)
Settings – Permalinks
Permalinks define the structure of your site’s URLs. Choosing the right structure is critical for:
- SEO: URLs with keywords rank better.
- User Experience: Clean links are easier to read and remember.
- Analytics & Sharing: Easier to track and share.
Permalink Structure Options

- Plain
- Example: example.com/?p=123
- Default setting, bad for SEO and user trust.
- Day and name
- Example: example.com/2025/07/06/sample-post/
- Good for news sites or dated content.
- Month and name
- Example: example.com/2025/07/sample-post/
- A balanced option with readable structure.
- Numeric
- Example: example.com/archives/123
- Uninformative, best avoided unless you need an archive-style format.
- Post name – RECOMMENDED
- Example: example.com/sample-post/
- SEO-friendly, clean, ideal for most blogs and websites.
- Custom Structure
- Create your own using tags: %year%, %monthnum%, %day%, %postname%, %category%, %post_id%
- Example: /blog/%postname%/ – useful for multi-content sites.
Extra Tips
- Avoid invalid characters in links – Use Latin characters for URLs to avoid encoding issues and boost SEO.
- Update .htaccess – WordPress tries to update it automatically after structure changes. If not, do it manually.
3. Install Essential Plugins
Plugins add functionality to your site. Right after installation, add the following essentials:
- SEO Plugin – Helps optimize your site for search engines.
- Rank Math
- Yoast SEO
- All in One SEO.
- Security Plugin – Protects your site from malware and attacks.
- Wordfence
- iThemes Security
- Sucuri.
- Caching Plugin – Improves site speed by caching pages.
- WP Super Cache
- W3 Total Cache
- LiteSpeed Cache.
- Backup Plugin – Automates backups and allows restoration.
- UpdraftPlus
- BackWPup
- Duplicator
- Anti-Spam – Blocks spam comments.
- Akismet
- Antispam Bee
- Image Optimization – Reduces image size without loss of quality.
- Smush
- ShortPixel
- Imagify
4. Choose and Configure a Theme
- Go to Appearance – Themes – Add New
- Recommended themes:
- Airin Blog – clean, responsive magazine theme for blogs and news sites.
- Bado Blog – modern, fast, SEO-optimized multipurpose blog theme.
- Click “Install,” then “Activate”
- Go to Appearance → Customize to upload logo, edit menus, colors, headers, footers, etc.
5. Create Essential Pages
Every website needs a few core pages. You can create them under Pages – Add New.
- Homepage – Introduces your site or business.
- About – Tells visitors about you or your company.
- Contact – Includes contact form, address, social links.
- Privacy Policy – Required for compliance with privacy laws (e.g., GDPR, CCPA).
- Terms of Service – Recommended for e-commerce or SaaS sites.
6. Set Up Navigation Menus
Menus help users navigate your site. Go to Appearance – Menus to create and manage them.

- Create a primary menu with links to essential pages (Home, About, Blog, Contact).
- Assign the menu to a theme location (Primary, Footer, etc.).
- Use custom links, categories, or post types if needed.
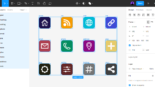
7. Configure Widgets
Widgets add small blocks of content to sidebars and footers. Configure them via Appearance – Widgets.
- Common widgets:
- Search bar
- Recent posts
- Categories
- Social media links
- Newsletter signup
- Use widget areas specific to your theme (Sidebar, Footer, Header).
8. Configure Backups
Regular backups protect your content from loss. Use a backup plugin to:
- Schedule daily or weekly backups.
- Store copies in cloud storage (Google Drive, Dropbox, Amazon S3).
- Enable one-click restore in case of crash or hack.
9. Strengthen Security
Follow these tips to secure your WordPress site:
- Use strong passwords and change default “admin” username.
- Limit login attempts to protect against brute force attacks.
- Enable 2FA (Two-Factor Authentication) for admin accounts.
- Install a security plugin like Wordfence or iThemes Security.
- Keep WordPress, themes, and plugins up to date.
10. Optimize for Performance
Speed impacts SEO and user experience. Use these practices:
- Install a caching plugin (e.g., WP Super Cache, W3 Total Cache).
- Use a CDN (e.g., Cloudflare) to distribute static assets globally.
- Compress images with plugins like Smush or ShortPixel.
- Limit plugins – Deactivate or delete unused ones.
- Minify CSS and JS files via your caching plugin.
- Choose a fast hosting provider optimized for WordPress.
Final Thoughts
Proper configuration of WordPress after installation lays a solid foundation for performance, security, and growth. Take time to complete each step carefully. Once the setup is complete, you’ll be ready to start creating content, building traffic, and growing your audience with confidence.